Saturday, July 13, 2019

What to do when a lawnmower won't start

Lawnmower Won’t Start? Do this.

A lawnmower that won’t start, especially when taken from storage, is almost always due to one problem: bad gas.

Storing a lawnmower in the fall without adding gasoline stabilizer to the fuel tank can cause the fuel to break down and plug the fuel passages. If fixing that problem doesn’t help, there are a few other common maintenance practices to try, as we explain below.

Here’s what to do when your lawnmower won’t start

Replace the gas

Over time (like the six months your lawnmower sat in your garage over the winter), the lighter hydrocarbons in gas can evaporate. This process creates gums and varnish that dirty the carburetor, plug fuel passages and prevent gas from flowing into the combustion chamber.

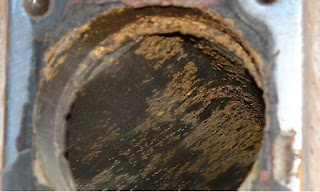
The carburetor bowl below formed corrosion and deposits during storage, which can easily plug fuel passages and prevent the engine from starting.

Carburetor bowl

Ethanol-containing gas can absorb water from the atmosphere, which can lead to phase separation, which occurs when ethanol and gas separate, much like oil and water. Ethanol that has absorbed enough moisture and has sat long enough can foul the fuel system and prevent the engine from starting.

No matter how many times you yank the starter cord and pollute the air with your advanced vocabulary, the lawnmower won’t start if it isn’t getting gas.

In extreme cases, evaporation of lighter hydrocarbons can change the gasoline’s composition enough to prevent it from igniting. The gas may be fueling the engine, but it doesn’t matter if it won’t ignite.

If you neglected to add gasoline stabilizer to the fuel prior to storage, empty the tank and replace with fresh gas. If the tank is nearly empty, simply topping off with fresh gas is often enough to get it started.

On some mowers, you can easily remove and empty the fuel tank. Sometimes that’s more trouble than it’s worth. In these cases, use a fluid extraction pump or even a turkey baster.

Clean the carburetor

You’ve replaced the fuel, but your lawnmower still won’t start.

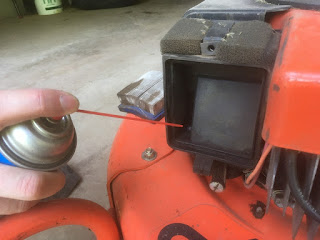
Next, try cleaning the carburetor. Remove the air filter and spray carburetor cleaner into the intake. Let it sit for several minutes to help loosen and dissolve varnish and gums.

Carburetor spray

On some carburetors, you can easily remove the float bowl. If equipped, first remove the small drain plug and drain the gas from the bowl. Remove the float bowl cover and spray the float and narrow fuel passages with carburetor cleaner.

This kind of “quick-and-dirty” carburetor cleaning is usually all it takes to get the gas flowing again and your lawnmower back to cutting grass.

If not, consider removing the carburetor from the engine, disassembling it and giving it a good cleaning. Be forewarned, however: taking apart a carburetor can lead to nothing but frustration for the uninitiated. Take pictures with your phone to aid in reassembly. Note the positions of any linkages or the settings of any mixture screws, if equipped.

If you’re at all reluctant, visit the servicing dealer instead. Also consider replacing the carburetor altogether. It’s a fairly simple process on most smaller mowers and it’s often less expensive than taking it to the dealer.

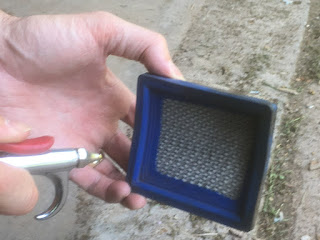
Clean air filter

Clean/replace the air filter

With the air filter removed, now’s the perfect time to clean it. Tap rigid filters on a workbench or the palm of your hand to dislodge grass clippings, leaves and other debris. Direct compressed air from the inside of the filter out to avoid lodging debris deeper into the media.

Use soap and water to wash foam filters. If it’s been a few years, simply replace the filter; they’re inexpensive and mark the only line of defense against wear-causing debris entering your engine and wearing the cylinder and piston rings.

Servicing spark plug

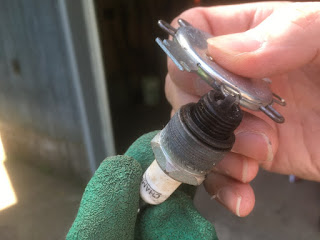
Check the spark plug

A dirty or bad spark plug may also be to blame. Remove the plug and inspect condition. A spark plug in a properly running four-stroke engine should last for years and never appear oily or burned. If so, replace it.

Use a spark-plug tester to check for spark. If you don’t have one, clip the spark-plug boot onto the plug, hold the plug against the metal cylinder head and slowly pull the starter cord. You should see a strong, blue spark. It helps to test the plug in a darkened garage. Replace the plug if you don’t see a spark or it appears weak.

While you’re at it, check the spark-plug gap and set it to the factory specifications noted in the lawnmower owner’s manual.

If you know the plug is good, but you still don’t have spark, the coil likely has failed and requires replacement.

Did you hit a rock or other obstacle?

We’ve all killed a lawnmower engine after hitting a rock or big tree root.

If your lawnmower won’t start in this scenario, you probably sheared the flywheel key. It’s a tiny piece of metal that aligns the flywheel correctly to set the proper engine timing. Hitting an immovable obstacle can immediately stop the mower blade (and crankshaft) while the flywheel keeps spinning, shearing the key.

In this case, the engine timing is off and the mower won’t start until you pull the flywheel and replace the key. It’s an easy enough job IF you have a set of gear pullers lying around the garage. If not, rent a set from a parts store (or buy one…there’s never a bad reason to buy a new tool) or visit the dealer.

My lawnmower starts, but runs poorly

If you finally get the lawnmower started, but it runs like a three-legged dog, try cleaning the carburetor with AMSOIL Power Foam. It’s a potent cleaning agent designed to remove performance-robbing carbon, varnish and other gunk from carburetors and engines.
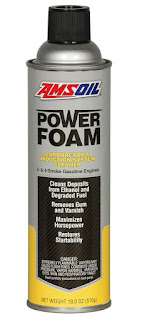
Carburetor Cleaner
AMSOIL Power Foam Carb Cleaner

Add gasoline stabilizer to avoid most of these problems


Which sounds better? Completing all these steps each year when your lawnmower won’t start? Or pouring a little gasoline stabilizer into your fuel tank?

Simply using a good gasoline stabilizer can help avoid most of the problems with a lawnmower that won’t start. AMSOIL Gasoline Stabilizer, for example, keeps fuel fresh up to 12 months. It helps prevent the lighter hydrocarbons from evaporating to reduce gum and varnish and keep the fuel flowing. It also contains corrosion inhibitors for additional protection.
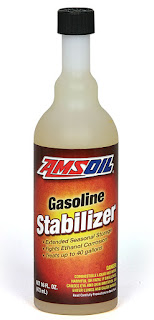
Fuel Stabilizer
AMSOIL Gasoline Stabilizer

I have a five-gallon gas can in my garage from which I fuel two lawnmowers, two chainsaws, two snowblowers, a string trimmer, an ATV and the occasional brush fire. I treat the fuel with Gasoline Stabilizer every time I fill it so I never have to worry about the gas going bad and causing problems.


You can also use AMSOIL Quickshot. It’s designed primarily to clean carburetors and combustion chambers while addressing problems with ethanol. But it also provides short-term gasoline stabilization of up to six months.

Sludge or Slime in the Radiator

 What causes radiator sludge/slime and what can you do about it?

• Additives dropping out: Coolant consists of a base (typically ethylene glycol or propylene glycol) mixed with additives and water. The base is primarily responsible for providing freeze and boil-over protection. The additives guard against corrosion, cavitation and scaling. Mixing of incompatible coolants can cause the additives to “drop out” of the solution and form sludge or slime.

• Contaminated coolant: A bad head gasket or cracked cylinder head can allow oil and coolant to mix, resulting in sludge. In vehicles with automatic transmissions, the engine-cooling system also cools the transmission. A breach in the system can contaminate coolant with transmission fluid.

• Corrosion: Occurs when an imbalanced coolant chemically reacts with metallic surfaces, forming reddish deposits that can appear as sludge or slime. 

Cooling-system corrosion.
Low-quality coolants can lead to cooling-system corrosion.
Performing fluid analysis is the only way to definitively identify what’s causing sludge/slime in your radiator. The report can identify oil, transmission fluid or other contaminants in the coolant.

Fix any mechanical defects and flush the cooling system. Refill with a high-quality antifreeze/coolant.

What kind of coolant should I use? 

Let’s start with what kind you should avoid.

You’re no doubt familiar with the conventional “green” coolants found at most retailers due to their low price. They contain inorganic salts, such as nitrites, phosphates and silicates.

Inorganic salts deplete quickly – typically in two years or less – and are on the environmental watch list. Once depleted, they are the source of common cooling-system problems, like scale deposits and sludge/slime.

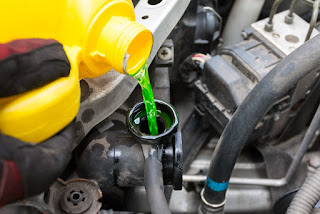
Green coolant
Low-cost “green” coolants are the source of several problems, such as radiator sludge/slime and scale deposits.
For these reasons, most vehicle manufacturers have moved away from inorganic salts. 

And so should you. 

Instead, use a high-quality coolant that uses organic-acid technology (known as OATs). OATS coolants are much more robust and longer-lasting. They virtually eliminate drop-out, scaling and compatibility issues inherent to inorganic salts. This type of coolant can be used in a wide variety of applications, even mixing with other coolants as a top-off. 

AMSOIL Antifreeze/Coolants

AMSOIL offers three coolants, all of which offer a unique blend of organic acids. We use di-acid technology, which means both ends of the organic acid are active. This makes them work faster and form stronger bonds for enhanced protection. 

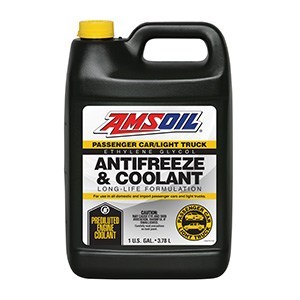
AMSOIL Passenger Car & Light Truck Antifreeze & Coolant is formulated for all passenger cars and light trucks. It is premixed 50/50 with high-quality water.
AMSOIL coolant
AMSOIL Passenger Car & Light Truck Antifreeze & Coolant
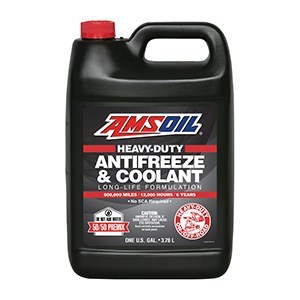
AMSOIL Heavy-Duty Antifreeze & Coolant is dialed in for the unique needs of on- and off-road heavy-duty applications. It is also premixed 50/50 with high-quality water.
AMSOIL Heavy Duty Coolant
AMSOIL Heavy-Duty Antifreeze & Coolant
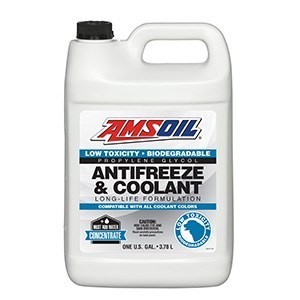
AMSOIL Low Toxicity Antifreeze and Engine Coolant is a 100-percent concentrate polyglycol formulation for situations that call for a low-toxicity product.
AMSOIL Low Toxicity Coolant
AMSOIL Low Toxicity Antifreeze and Engine Coolant


Zinc Wear Prevention in Motor Oil

Do Older Engines Need Oil With ZDDP Additives?

What is high-zinc motor oil?

Zinc dialkyldithiophosphate (ZDDP) is the most common zinc-based additive and is used primarily as an anti-wear agent to prevent premature engine wear. It also provides corrosion and oxidation protection.

However, because the zinc and phosphorus found in ZDDP can negatively affect catalytic converters, it has been phased out of motor oil formulations in recent years.

Reducing ZDDP has drawbacks, as classic-car owners have found. Older vehicles with flat-tappet camshafts and, in particular, engines that include high-tension valve springs or other modifications that create high contact pressures, can suffer premature wear due to reduced ZDDP levels.

For best protection, engine builders and gearheads typically use high-zinc and high-phosphorus motor oil to offer extra protection for flat-tappet cams, lifters and other components during break-in. AMSOIL Break-In Oil, for example, contains 2,200 ppm zinc and 2,000 ppm phosphorus.
Buy AMSOIL Break-in Oil


How do ZDDP additives work?


ZDDP anti-wear additives are heat-activated, meaning they provide wear protection in areas of increased friction.

As temperatures rise and surfaces come closer together, ZDDP decomposes and the resulting chemistry protects critical metal surfaces. When parts move during operation, any sliding or rolling motion takes place on top of or within the ZDDP anti-wear film, which reduces metal-to-metal contact.
Lifters
Flat Tappet Lifters

This is especially important in engines with flat-tappet camshafts or engines modified to create more horsepower. High-tension valve springs, often used in racing applications, also increase the potential for cam wear and require additional ZDDP.

Flat-tappet cams vs. roller cams

The design of flat-tappet cams makes them especially vulnerable to wear. As the name indicates, the tappet – or lifter – is flat. During operation, the cam-lobe slides rapidly over the tappet, increasing friction and temperatures.

A thin oil film is the only barrier that prevents the lifter and cam lobe from welding together.

If the oil film fails or provides insufficient wear protection, the two components can eventually wear the flat-tappet cam and affect valve operation. Engine power and efficiency can decline if the flat-tappet cam cannot lift the valves enough to adequately charge the chamber for ignition or release exhaust fumes. Because most V-8 engines of the muscle-car era came standard with flat-tappet cams, the problem is especially prevalent to classic-car and hot rod owners.

Roller cams, on the other hand, are differentiated by rolling contact rather than sliding contact. Although costlier, roller cams are common in most modern vehicles and can be retrofitted into classic-car and hot-rod engines.


The role of piston rings

Even though Hugh didn’t ask about it specifically, I should also mention the importance of seating the piston rings during break-in.

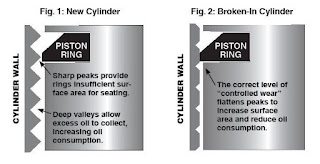
Although a new or freshly honed cylinder appears smooth to the naked eye, it actually contains microscopic peaks and valleys. If the valleys are too deep, they collect excess oil, which burns during combustion and leads to oil consumption.

The sharp peaks, meanwhile, provide insufficient area to allow the rings to seat tightly. That means highly pressurized combustion gases can blow past the rings and into the crankcase, reducing horsepower and contaminating the oil.

Breaking in the engine wears the cylinder-wall asperities, providing increased surface area for the rings to seat tightly. The result is maximum compression (i.e. power) and minimum oil consumption.
Seating piston rings

Do you always need an oil with ZDDP additives?

Do you need to use high-zinc motor oil in an older engine after break-in, which is typically about 500 miles?

Yes, if you want to maintain horsepower and promote longevity. 

Even after the cam has seasoned, it’s still exposed to tremendous heat and pressure, especially in a heavily modified or racing engine. The constant barrage of pressure can rupture the oil film responsible for preventing wear, leading to metal-to-metal contact.

After break-in, we recommend using an oil with at least 1,000 ppm ZDDP in a flat-tappet engine. That way, you’re providing your expensive engine with maximum protection against wear and horsepower loss.

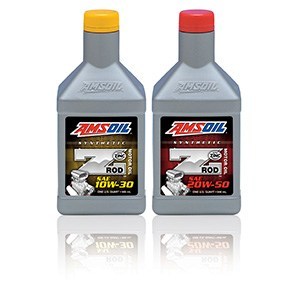
AMSOIL Z-Rod Synthetic Motor Oil, our primary recommendation for classic cars and hot rods, contains more than 1,400 ppm zinc and more than 1,300 ppm phosphorus.

High zinc synthetic motor oil

That’ll keep your classic car running for the long haul.

Friday, July 12, 2019

AMSOIL Signature Series

Signature Series: Maintains Protective Viscosity

AMSOIL Synthetic Motor Oil

The main bearings in your vehicle rely on an oil film thinner than a sheet of paper. When motor oil loses viscosity due to a process called shear, it can fail to provide the required level of wear protection.
Shear (often called mechanical shear) occurs when one layer of oil moves in the opposite direction of another layer of the same oil. This often occurs between the piston and cylinder wall. These two oil films move in opposite directions under intense heat and pressure.
AMSOIL synthetic motor oil features naturally shear-resistant base oils combined with top-tier viscosity improvers to withstand extreme heat and shearing forces. In fact, Signature Series fights viscosity breakdown better than the competition*, providing superior protection of pistons, cams and bearings.
Signature Series stands up to the potentially devastating effects of viscosity breakdown and provides maximum engine protection.
AMSOIL Synthetic Performance Test

*Based on independent testing of AMSOIL Signature Series, Schaeffer’s Supreme 9000 Full Synthetic, Lucas Synthetic, Valvoline Conventional Daily Protection, Mobil 1 Annual Protection and Pennzoil 5W-30 in the Kurt OrbahnTest. Oils purchased on 5/3/18.
For product information on AMSOIL Synthetic Motor Oil.